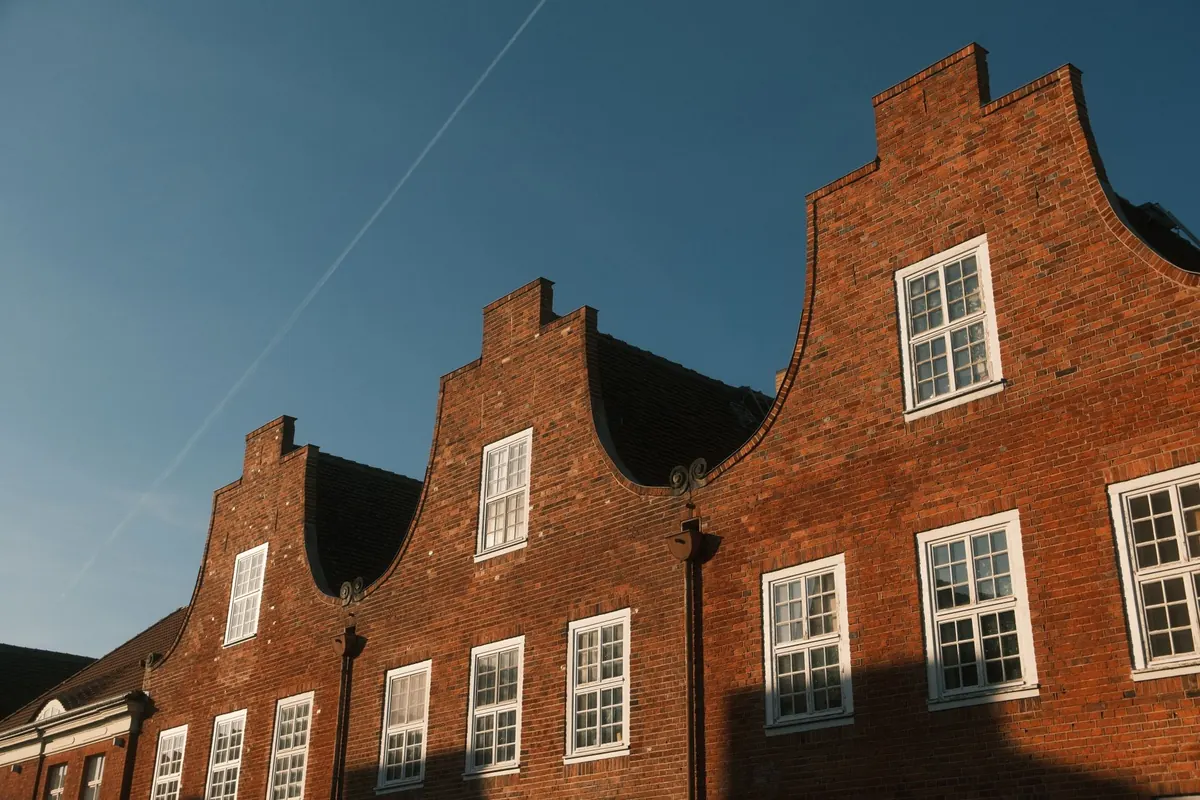
A Beginner's Guide to Suffolk Quarter's Historic Architecture Walk
Most people cross the Quarter with their eyes at shop-sign height. Which is a shame, because the best of it sits a storey higher, and much of it has been there for four hundred years. This walk is written for anyone who has never consciously looked at a building and thought about why it looks the way it does. You need comfortable shoes, an hour, and the mild willingness to stand on a pavement and stare upwards.
What the Quarter Is, in Broad Strokes
Like most East Anglian towns, the Quarter grew in layers rather than all at once. The oldest parts cluster around the church and the market place, where a medieval street pattern survives in the curve of the roads and the odd wedge-shaped plots. Wealth arrived with the cloth trade, then with the river and the wharf, then with the railway. Each of those phases left buildings behind, and because nobody had the money to knock everything down and start again, they are stacked on top of one another — a sixteenth-century frame behind a Georgian brick front, a Victorian shopfront bolted onto both.
That layering is the whole point of the walk. You are not looking at a museum of one period. You are looking at four centuries of people adapting what was already there.
Before You Set Off
Half the pleasure of this walk is not being rushed, so give it a realistic slot. Ninety minutes is comfortable. Fifty minutes is possible if you skip the terraces at the end.
- Footwear: the pavements are uneven, and cobbled or flinted sections are hard on thin soles. Trainers beat anything smarter.
- Timing: early morning or late afternoon gives low, raking light that shows up texture in brick and plaster. Flat midday sun hides it.
- Kit: a phone camera, and something to make notes on. A small pair of binoculars is genuinely useful for roof-level detail.
- Manners: most of these buildings are homes or working premises. Admire from the pavement. Don't press against windows or wander up private paths.
- Stamina: there is a bench in the churchyard and usually a seat near the market cross. Use them.
A Three-Minute Crash Course in Reading a Building
You do not need a glossary. You need four or five things to look for, and the confidence to guess.
Timber frame. If a facade leans, ripples or bulges, there is probably a timber frame under the plaster. Look for overhanging upper floors — that jetty is a strong sign of a late medieval or Tudor building. Look too for the ghost of the frame: faint vertical and horizontal lines in the render, or peg holes where a frame has been exposed.
Georgian brick. Symmetry, restraint, and a roof you often cannot see. Sash windows that slide up and down, a smart doorcase with a fanlight above it, and a parapet hiding the roofline are all clues. Windows are usually taller on the first floor than the second, and smaller again at the top.
Victorian and Edwardian. Confidence and decoration. Bay windows, coloured or patterned brickwork, terracotta, carved bargeboards, bigger panes of glass. Where Georgian work is quiet, Victorian work wants to be noticed.
Brickwork itself. Older walls are often thicker and softer, and their bricks vary in colour because they were fired in small batches. Long, unbroken runs of identical brick usually mean a later date.
Foreign parts. Nearly every building has a back. A Georgian front on a street can conceal a much older wing behind it. Where you can legitimately see a rear elevation from a car park or a footpath, look: that is often where the history is.
Five Stops That Tell the Whole Story
The route works in any direction, but this order builds the story from oldest to newest.
1. The churchyard edge
Start here for the medieval layer. Look at the walls before the building: flint rubble, patches of reused stone, deep buttresses, and a tower that has clearly been repaired more than once. Then notice the churchyard wall and the ironwork. Gravestones leaning at angles are not neglect — they are ground movement, and they tell you how soft the subsoil is.
2. The old commercial street
This is where the walk gets interesting. Stand back and look at the first floor of a shop. Above almost every modern frontage there is an older building: a jettied timber range, a gable, a run of small sash windows, sometimes a whole Georgian facade with a Victorian shop inserted at ground level. Shopfronts get replaced every generation. Upper floors survive.
3. The wharf and the warehouses
Brick, height and function. Wharf buildings are plain because they were never meant to be pretty. Look for tall, narrow windows, loading doors on the upper floors, and projecting beams or a surviving hoist bracket above them. Slate roofs, iron columns inside where you can see through a window, and a complete absence of decoration are all signs of a working building rather than a merchant's house.
4. The terraces behind
Walk two streets back from the commercial strip and the character changes completely. Here are rows of Victorian and Edwardian houses, built as a single design and then personalised by generations of owners. Look for the pattern: identical bays, then one house with a different door, another with a replaced window, a third with its original tiled path and boot scraper. Pick one terrace and compare five houses in a row.
5. The station approach
Finish with the nineteenth-century confidence of the railway. Big, plain, classical shapes, brick with stone dressings, a canopy, a clock. This is the layer that ended the town's dependence on the river, and it is worth remembering as you walk back to where you started.
What Beginners Get Wrong
- Looking only at eye level. Doors and shopfronts change; rooflines and upper floors do not.
- Assuming one date per building. Almost every building on this walk is at least two buildings in one.
- Trusting a smart front. A crisp Georgian facade on an old street is usually a refronting, not a new build.
- Ignoring the ground. Cellar hatches, coal holes, boundary stones and worn thresholds are evidence too.
- Photographing straight on. Shoot from an angle, in soft light, and include the roof.
- Walking too fast. Two good buildings studied properly beat twenty glanced at.
Making the Walk Your Own
Once you know the route, give each visit a theme. One trip, look only at windows: sash versus casement, six panes versus two, original versus replacement. The next, look only at brick bonding and colour. The next, doors. You will notice things you walked past a dozen times.
Winter is underrated for this. Bare trees reveal facades, and low sun shows every lump and patch in old plaster. If you get hooked, heritage open days and local history society walks will take you inside buildings you can normally only study from the street. And if you happen to own one of these old places, remember that alterations to historic buildings usually need consent — a quick conversation with the local conservation officer before you start is always the cheaper route.
Most of all, don't treat the walk as a test. Guessing wrong about a date is fine. The habit of looking up is the thing worth keeping.
Photo: Tim Heckmann / Pexels


You Might Also Like
A practical guide to free family days out around Suffolk Quarter, comparing parks, trails, museums and community spaces by facilities and the ages they suit best.
A practical guide to permits, business rates, grants, networking and support services for anyone starting a small business in Suffolk Quarter.